Peanut Butter Banana Muffins

IMG_6508

It’s been a long week. My week typically begins with three heavy training days and a yoga class (which is sometimes more challenging than a high volume squat day) and by the time I make it to Friday, I’m almost looking forward to a rest day. Almost.

So on Fridays I bake. A lot. I tell myself that I bake just to keep busy, which is partially true, but I really just love the science of it all. And I love giving all of these baked goods away. I’m actually a 25 year old with the mentality of a grandma.

Today I made an old favorite: peanut butter banana muffins with mini chocolate chips. These are amazingly dense and filling, and use oat flour as opposed to regular flour.

Ingredients:

  • 1 cup mashed ripe banana (2 large bananas or 3 small)
  • 1 cup cream natural peanut butter (I use my own homemade PB)
  • 1/3 cup honey
  • 2 tsp vanilla extract
  • 2 eggs
  • 1 tsp cinnamon
  • 1/2 tsp baking powder
  • 1 tsp baking soda
  • 1 1/3 cup oat flour (grind 1 3/4 cup oats in a food processor or use Bob’s Red Mill brand)
  • 1/2 cup mini chocolate chips
  • Cooking spray

Directions:

  1. Preheat oven to 350 degrees F.
  2. Mix mashed bananas, peanut butter, honey, vanilla, and eggs using a hand mixer. Be sure to use a full cup of mashed banana and measure that out first.
  3. Mix dry ingredients together in a separate bowl. Add dry ingredients and blend with hand mixer while scraping the the sides of the bowl until just mixed together. Do not overmix! Stir in chocolate chips.
  4. Spray muffin tin with cooking spray. Spoon batter into prepared muffin tin, filling each cup almost to the top.
  5. Bake for 15-17 minutes or until muffins are cooked through. Do not overbake or you will end up with some very dry muffins.
  6. Enjoy!

IMG_6505

Yields 20 muffins. 

Calories: 180 [20g Carbs, 8.7g Fat, 5.4g Protein]

Happy Fri-yay!

Glazed Chocolate Banana Donuts

IMG_6450
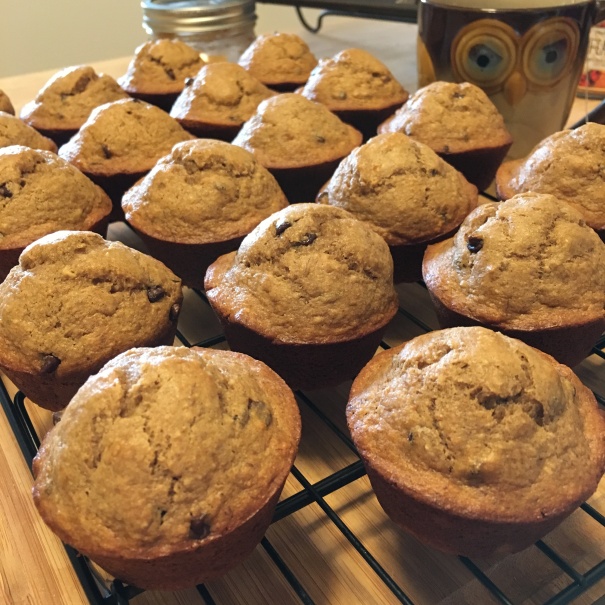
I’m a little obsessed with donuts. I’ve been tracking calories and macros for over a year, and at one point I had completely given up all baked goods. It was a little over the top – I wouldn’t even eat birthday cake on my OWN BIRTHDAY.

I’ve gotten out of that super restrictive pattern of dieting now. I focus more on balance – if I eat healthy most of the time, there’s no reason why I can’t indulge in something sweet. I do, however, like to make as many healthy swaps as possible, and that’s why this recipe is so great. It uses bananas, flax milk, and coconut oil as healthier subs, and still makes these donuts taste amazing.

Ingredients:

Donuts:

  • 1/2 cup all-purpose flour
  • 1/2 cup whole wheat flour
  • 1/4 cup unsweetened cocoa powder
  • 1/2 tsp baking powder
  • 1/2 tsp salt
  • 1/2 cup granulated sugar
  • 1/2 cup flax milk
  • 1/4 cup pureed banana
  • 4 tbsp melted coconut oil
  • 1 tsp vanilla extract

Chocolate Glaze:

  • 1 cup powdered sugar
  • 4 tbsp unsweetened cocoa powder
  • 1/4 tsp sea salt
  • 4 tbsp flax milk
  • 1/2 tsp vanilla extract
  • sprinkles or mini chocolate chips

Directions:

  1. Preheat the oven to 350 degrees. Spray donut pan with non-stick spray.
  2. In a medium bowl, whisk together dry ingredients through sugar. In a small bowl, whisk together wet ingredients through extract until well combined.
  3. Pour the wet ingredients into the dry ingredients and fold together until the ingredients are well combined. Pour batter into a pastry bag or ziploc bag and cut off the tip of the bag. Pipe the batter into the donut pan until 2/3 full.
  4. Bake donuts for 13 minutes or until the donuts are firm and spring back when touched. Remove from the oven.
  5. Allow donuts to rest prior to placing them on a wire rack to cool completely.
  6. While donuts are cooling, mix all of the glaze ingredients together. The glaze should be thick, but not too thick that it can’t be poured.
  7. Dip each donut into the chocolate glaze. Let the glaze drip back into the bowl before returning to the wire rack. Decorate with sprinkles or chocolate chips.
  8. Enjoy!

Makes 6-9 donuts (I didn’t pipe nearly as much into the pan so I ended up with 9 of them).

Funfetti Baked Donuts

IMG_6446Last week I experimented with a protein donut recipe, or “pronuts” as Kevin likes to call them. However, sometimes you just need the real deal. Flour, butter, sugar, oh my! And don’t forget the rainbow sprinkles.

Fortunately, if you’re still feeling a little health conscious, these donuts are baked and not fried. Does that make it better? I think it does. So live a little, lift heavy things, and eat a donut.

Ingredients:

Donuts:

  • 1 cup all-purpose flour
  • 1 tsp baking powder
  • 1/4 tsp baking soda
  • 1/4 tsp nutmeg
  • 1/3 cup granulated sugar
  • 1/4 cup 2% milk
  • 1/4 cup plain Greek yogurt
  • 1 large egg
  • 2 tbsp melted butter
  • 1 1/2 tsp vanilla extract
  • 1/2 cup rainbow sprinkles

Glaze:

  • 1/4 cup 2% milk
  • 2 cups powdered sugar
  • 1 tsp vanilla
  • extra sprinkles for topping

Directions:

  1. Preheat oven to 350 degrees. Spray donut pan with non-stick spray.
  2. For the donuts: whisk flour, baking soda, nutmeg, and granulated sugar together in a bowl. Set aside.
  3. Whisk the milk, yogurt, and egg until until smooth. Add melted butter and vanilla, whisking until fully combined. Pour the wet ingredients into the dry ingredients and stir until just combined. Do no overmix – the batter will be thick. Fold sprinkles in gently to prevent the color from bleeding into the mix.
  4. Pipe the batter into the donut pan using a pastry bag or ziploc bag with the tip cut off for ease of piping. Fill 2/3-3/4 full.
  5. Bake for 10 minutes or until the edges are lightly browned. Allow the donuts to cool before glazing (very important!). The glaze will set better on a cooled donut.
  6. For the glaze: combine glaze ingredients in a medium saucepan over low heat. Whisk until smooth. Remove from heat and immediately begin dunking donuts in the glaze one by one. Take each donut and dunk a second time if there is enough glaze left over. Sprinkle with additional sprinkles.
  7. Donuts can be stored at room temperature for 2 days or can be frozen glazed or unglazed up to 2 months.
  8. Enjoy!

IMG_6448

Makes 8-10 donuts (depends on how much you pipe into the donut pan – I ended up with 10 and I ain’t even mad)

Do it for the donuts

IMG_6408I’ve been on a high carb kick lately, so this morning I woke up and really wanted a donut… BUT I also didn’t want to put on pants. Do you see my problem? Pants are the worst.

Fortunately for me, I had an easy recipe for donuts that I was able to mix up and bake in under 30 minutes. Just enough time to let my brain wake up and remember to use an oven mitt when taking these out of the oven. Another bonus: while these donuts aren’t as sugary sweet as their store bought minions, they’re only 85 calories per donut. So you could eat one or six and not feel bad. If it fits your macros, am I right?

Ingredients:

For the donuts:

  • 2 cups Kodiak Cakes flapjack & waffle mix (found at your local Target)
  • 1/2 cup Good Karma flax milk + protein (you can use almond milk too)
  • 1/3 cup water
  • 1 large egg
  • 1 tsp vanilla extract
  • 3 tbsp Wholesome zero calorie sweetener (more if you need it)

For the glaze:

  • 2 scoops vanilla protein powder (or whatever brand/flavor your heart desires)
  • 1/4(ish) cup flax milk (enough to make a thick glaze)
  • 1/2 tsp almond extract

Directions:

  1. Preheat oven to 350 degrees. Spray a donut pan with coconut oil spray. Set aside.
  2. Mix all of the donut ingredients together. The batter consistency will be light and airy.
  3. Spoon batter into a ziploc bag and cut off tip of bag to squeeze batter into the donut pan. Do not overfill – fill pan indentation halfway. These donuts will rise quickly.
  4. Bake 7 minutes and then remove from oven to cool.
  5. Meanwhile, mix protein powder, extract, and flax milk together to create a glaze.
  6. Once the donuts are cool enough, dip too half of each donut into glaze. Add sprinkles or whatever toppings you want. Let set for a few minutes (if you can wait).
  7. Enjoy!

Makes 12 donuts. Or 10 if you’re sharing because you need to taste test 2 of them, for science.

Macro breakdown: 1.3F, 10.1C, 8.5P


Poptarts for PRs

IMG_6386
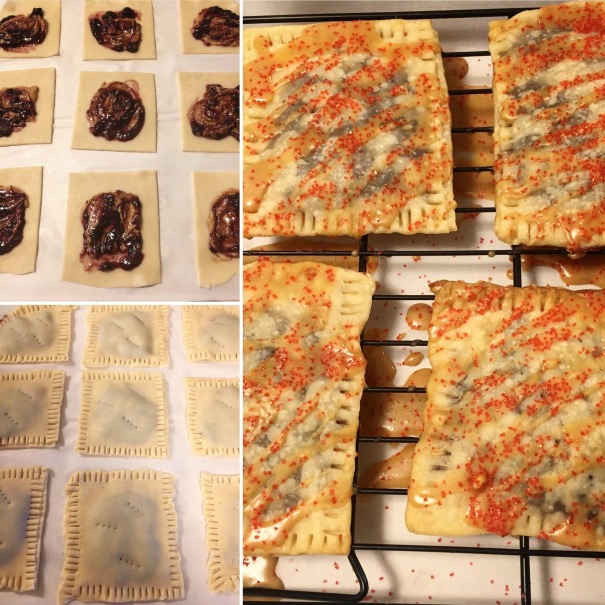
Lately I’ve found that baked goods and powerlifting pair really well. As someone who’s been on the low carb train for quite some time, this is paradise. And paradise isn’t complete without homemade poptarts. Very simple, but delicious pre-workout noms.

Ingredients:

  • 1 container Pillsbury pre-made pie crusts (2)
  • Smucker’s Triple Berry jam
  • Peanut butter (optional)
  • 1 cup powdered sugar
  • 1 tsp vanilla extract
  • 2-4 tsp water
  • sprinkles

Directions:

  1. Preheat the oven to 425 degrees. Line a baking sheet with parchment paper.
  2. Roll the pie crusts out to 1/8″ thickness and try to flatten into a square. It might look more like a rounded square, but that’s alright.
  3. Cut each crust into 9 pieces. Try to make the pieces the same size between each crust.
  4. Lay the first 9 pieces of pie crust on the baking sheet. Space out well. Spoon 1 tsp of jam onto each piece of crust. Spoon 1 tsp of peanut butter onto each crust. Mix in with the jam. If you don’t want to add peanut butter, spoon 2 tsp of jam onto each piece of crust.
  5. Lay the remaining 9 pieces of pie crust onto the pieces on the baking sheet. Try to match them up by size as much as possible. Crimp the edges with a fork to seal them. Use fork to prick the poptarts two to three times.
  6. Bake for 11-13 minutes, or until golden brown.
  7. Allow to cool for several minutes, then transfer to wire cooling rack.
  8. Once cooled, mix powdered sugar, vanilla extract and water together to make a glaze. Actual amount of water added depends on how thin you want your glaze to be, so start with 2 tsp.
  9. Top with sprinkles, let the glaze set, then enjoy!

New cycle, new perspective

About 8 weeks ago, I competed in the 2017 USAPL Wisconsin State Open. It was an incredible experience and I walked away feeling significantly more confident in my lifting abilities. I’ve managed to hang on to that feeling since then; enduring a weight cut immediately following the meet and starting a new training cycle in preparation for my next meet in June.

Today was the last day of the current cycle and today that confidence was decimated. I’ve not been able to pull anything above 205 with my sumo deadlift; I’m a lot more comfortable with conventional. But today I  was only able to get 205 off the ground ONCE. Everything after that just didn’t want to move.

To say that I’m hard on myself would be an understatement. I don’t tolerate failure well, and I’m a “go hard, or go home”, “failure is not an option”, “all or nothing” type of person.

Or at least I was?

I may have had a serious blow to my ego today, but with this new cycle comes a new perspective. I need to remind myself of several things:

  1. I’ve only been lifting for about a year; I’m still considered a novice and powerlifting is not a sport where you suddenly reach a point and know everything. Strength ebbs and flows in response to what you have going on in your life. What I lifted on January 19th, for example, has very little bearing on what I needed to lift today.
  2. It’s perfectly alright to not have a perfect training session. That’s why we train multiple times a week, multiple weeks out of the year. Let’s say I lift 4 times a week 45 weeks out of the year… that’s 180 training days. I’m bound to screw up some of them, and while it might be embarrassing, there is a huge learning curve to consider.
  3. There’s a lot of variables to consider. As much as I would love to do only x + y to get to z, that’s not always going to happen. Proper nutrition, sleep, and warm-ups have a significant impact on my training days and today was no exception; I didn’t get enough sleep, tried to compensate with caffeine, and ended up dehydrating myself in the process. And that was just on top of the hip pain I’m trying to manage when pulling sumo. Do I usually get enough rest, water, and food before I train? Absolutely, but sometimes weird things happen.
  4. Ask your self why you do what you do. I lift because it makes me feel good. I compete because it’s fun (and I’m a ridiculously competitive person).
  5. Progress is not always easy to see at first glance. I need to remind myself that I am not the same as I was last year, last month, or even last week.

Now it’s time to take those weaknesses that surfaced today and crush them in the next cycle. And as always, leave my ego at the door.

Protein Peanut Butter Cups

IMG_4657

I always try to include a little peanut butter in my life, regardless of whether I’m tracking calories or macros at the time. The first time I made these, I was hooked. If you have a major sweet tooth like me and you need a cleaner treat, try these.

Ingredients:

  • 1/4 cup creamy peanut butter (I use my homemade PB)
  • 2-3 tbsp vanilla protein powder
  • 1 cup dark chocolate chips
  • 1 tbsp coconut oil

You’ll also need mini cupcake liners.

Directions:

  1. Fill muffin tin with mini cupcake liners and spray with coconut oil spray. Set aside.
  2. In a medium sized bowl, mix peanut butter and protein powder together. Start with 2 tbsp and add more protein powder, if necessary. The amount of protein powder added depends on how drippy the peanut butter is.
  3. Roll the peanut butter protein mixture into 12 marble sized balls and set aside.
  4. In the microwave, melt dark chocolate and coconut oil, stirring every 45 sec until smooth.
  5. Scoop 1 tsp chocolate coconut oil mixture into the bottom of each mini cupcake liner. Place in freezer for 10-15 minutes, or until chocolate hardens.
  6. Place one of the peanut butter protein balls into each mini cupcake liner and flatten with your finger until the top is smooth.
  7. Add 1-2 tsp of chocolate mixture to the top of each peanut butter cup. Place in freezer for an additional 10-15 minutes, or until chocolate is hardened.
  8. Enjoy!

Slow Cooker Cashew Chicken

Life can get busy, which is why I love slow cooker recipes. If you’re craving Chinese food, this is a great recipe to whip up for the week.

Ingredients:

  • 1 tbsp olive oil
  • 1/3 cup chopped onion
  • 1/2 cup chopped carrots
  • 2 celery stalks
  • 1 pepper, diced (personally I like red bell peppers)
  • 1 garlic clove
  • 2 lbs boneless skinless chicken breast, cut into 1 inch pieces
  • Black pepper
  • Ground ginger
  • 1 cup low sodium chicken broth
  • 1/4 cup low sodium soy sauce (or Bragg’s aminos)
  • 3 tbsp rice vinegar
  • 2 tbsp ketchup (or sub in a thicker sauce like Kikkoman’s spicy miso for more kick)
  • Sriracha (ALWAYS)
  • Red pepper flakes
  • 1/2 cup cashews
  • 2-3 cups cooked quinoa

Directions:

  1. Heat 1 tbsp oil in a skillet over medium heat. Toss onion, carrots, celery, and pepper and saute for 5 minutes. Add garlic and saute another minute. Put mix in slow cooker on low.
  2. Add 1 tbsp oil to skillet and season chicken with black pepper and ginger, however much you’d like. Brown chicken and place in slow cooker atop vegetables.
  3. Combine broth, soy sauce, vinegar, and ketchup (or sub) in a bowl and pour over chicken.
  4. Cook on low 3-4 hours. Serve with quinoa and top with cashews, sriracha or red pepper flakes.
  5. Enjoy!


Superfood Granola

WARNING. This granola recipe is extremely addicting. I guarantee that you won’t be able to eat just one serving, and really, that’s alright because this granola is packed with so many power foods that you’d be doing your body a favor to eat just a little more of it.

img_6197

Ingredients:

  • 2 1/2 cups rolled oats
  • 1 cup unsweetened shredded coconut
  • 2 cups unsalted roasted mixed nuts (I like to use the big tub of nuts from Archer Farms)
  • 1/2 cup sunflower seeds
  • 1/2 cup pumpkin seeds
  • 1/4 cup quinoa
  • 1 package dried blueberries (or cherries)
  • 1/4 cup chia seeds
  • 1/4 cup hemp hearts
  • 1/4 cup cacao nibs
  • 1/2 cup honey
  • 2 tbsp coconut oil
  • 2 tbsp homemade peanut butter (see chocolate peanut butter protein bar recipe)
  • 1/2 tsp sea salt
  • 1/2 cup dark chocolate chips (or white chocolate)

Directions:

  1. Preheat oven to 350 degrees F. Line a large baking tray with parchment paper.
  2. Place the rolled oats, coconut, pumpkin seeds, sunflower seeds, and mixed nuts on the baking tray and bake in the oven until fragrant, about 10 minutes. Remove from the oven and place in a large bowl.
  3. Toast the quinoa in a medium sized dry frying pan over medium high heat. Shake the pan frequently to prevent the quinoa from burning and remove the pan once the quinoa is light brown and fragrant. Add the quinoa to a large bowl with the oats and nuts. Add the dried fruit, chia seeds, hemp hearts, and cacao nibs. Toss well.
  4. Heat the honey and coconut oil over medium heat in a small pot. Bring the pot to a boil and let it boil hard for 3 minutes. Watch the honey closely as it bubbles – don’t let it boil over! Stir in the peanut butter and the sea salt.
  5. Pour honey over oats and mix well. Let the granola cool slightly and then stir in the chocolate. (Tip: I don’t let it cool completely – if it’s a little warm the chocolate will melt and help the granola stick into large chunks. Large chunks = better for snacking on the go).
  6. Pour the granola into a baking tray lined with parchment paper and place in the refrigerator for at least one hour.
  7. Remove the pan from the fridge and use the overhanging parchment paper to pull out the block of granola OR start breaking granola into chunks on the pan to save some mess. Once the granola is broken into chunks, store the granola in a sealed plastic bag or container at room temperature. The granola will keep for several weeks – but it won’t last that long 😉
  8. Enjoy!

Top 5 Reasons Why You Should Work With A Personal Trainer

A year ago, Kevin and I joined a gym. Sounds like a really exciting start to a story, huh? Well it was both exciting and terrifying for both of us. Neither of us had wanted to join a gym in the past, regardless of how many times we said to each other, “We need to start being healthier.” We avoided working out for quite a while because we a.) didn’t want to look like we didn’t know what we were doing, and b.) didn’t actually know what we were doing.

After looking into a few local gyms (it had to be nearby or we wouldn’t go) we picked Oak Creek Fitness, got started with personal training, and it’s been a complete game changer.

The funny thing is, I thought I was going to hate the personal training. I’m stubborn and I know full well how I deal with criticism. Our first day was a general assessment of our fitness abilities, or lack of. In my case, it was definitely lack of. I could barely do a full push-up, holding plank position for over a minute was a struggle, and I couldn’t even do a full squat hold. YIKES. It was discouraging because I’d always considered myself an active individual, not necessarily fit, but I had played tennis for years and earned my second degree black belt before the age of 18.

Now before this starts sounding like a horror story, hear me out, because I’m going to give you 5 reasons why you should get a personal trainer.

  1. They can be an objective eye. I’ve been working with our trainer for a year and there are STILL exercises that I think I’m doing correctly but I’m really not. Skullcrushers and lateral raises, I’m looking at you. More often than not, your trainer has a more realistic idea of what you can and cannot do during a workout. Would I love to max out my squat every week? Absolutely. Fortunately our trainer helps me keep my ego in check and ensures that I don’t fail any of my lifts.
  2. They push your limits. I’m Type A and tend to push myself harder than I need to, but some days I just don’t have it in me to give 100%. I’ve been dealing with a significant amount of stress at work and I struggle with not taking my work home with me, so I end up carrying that stress into the gym and start my workouts feeling less than optimal. Sometimes you need someone to push you a little harder than you would push yourself, and this is especially important on your bad days. Working with someone who can see your abilities better than you see them and having them push you is worth it, even if you can’t see it at the time.
  3. They hold you accountable. Or at least give you the tools that help you hold yourself accountable. When we first started training, we kept track of our food and were given “homework” workouts. Now I say that they hold you accountable, but only to a point. They want to see you succeed, but you have to want it just as much. You don’t see the results you want if you don’t follow instructions, and it’s a lot harder to skip out on an appointment with a trainer than just free gym time by yourself.
  4. They’ll design workouts that work for YOU. Kevin and I both train together twice a week with our trainer. His range of motion is different than my range of motion, he’s a full foot taller than me, and doesn’t like to squat as much as I do. Do you see where I’m going with this? We train together, but we focus on different things. We have very different strengths and weaknesses, so it’s pointless to try and do the same workouts and expect the same results. Our personal trainer is fully aware of what we both can and cannot do, so he modifies our workouts all the time to get both of us performing where we need to be.
  5. They provide nutritional guidance. This one is especially important to me because after years of being active but having sub par nutritional habits, I finally dialed in on what nutrition works best for me with the help of our trainer. You’ll hear that a lot of weight loss happens in the kitchen first and it’s true; what you eat fuels your workouts and while finding nutritional harmony isn’t easy, it’ll happen with a lot of trial and error. It’s not necessarily calories in, calories out; there’s macro-nutrient ratios and nutrient timing and a whole bevy of things the average gym goer doesn’t think about.  Personal trainers can work with you to help you strike a balance with nutrition to get the most out of your workouts.


BONUS:  They help you reach your goals. And then help you make new ones once you reach them.